The Sale Content block is the primary way to build your sale’s landing page. Every sale you run has three distinct periods: before, during, and after the sale.
Use this block to set the sale period for every block within the container. Nested blocks are automatically hidden or shown based on the parent block’s setting and the current date and time. This block is available for all sites that use the WordPress Block Editor.
Perfectly Timed Messaging
A landing page that shows the right content at the right time isn’t just another dead end page when the sale is over. It’s a living resource that has backlinks—and continues to help you build your business for weeks after the sale ends.
Use this block to design a landing page that helps you at every phase of the sale:
- Before the sale, your landing page helps you build awareness and excitement in advance of the event.
- Show visitors a countdown timer to get them excited for the event.
- Add a mailing list signup so they get your sale notification emails.
- Advertise exactly what’s going on sale—and for how big a deal. Or keep that info super private and mysterious.
- After the sale, you can use the same landing page to share information with people who missed the sale.
- Show visitors other ways to save by including a link to your site’s discounts and coupons page.
- Add a mailing list signup so they won’t miss out on another sale.
- Insert follow links for your social media channels to help customers find you all over the internet.
But most importantly—you need to show your exact offer and how to claim it when the sale is live.
- For WooCommerce, consider inserting a product loop or single product block.
- For Paid Memberships Pro, consider adding the Membership Levels or Membership Checkout block or shortcode.
- For Easy Digital Downloads, consider using the downloads shortcode to show one or more products.
Some other landing page content ideas to support your sale and conversions include:
- Social Proof: Show testimonials from happy customers. If you have a lot of testimonials, consider highlighting the comments about the specific products, services, or memberships for this sale.
- Countdown Timer: Make it super clear when the sale ends. The built-in countdown timer block creates FOMO and urgency.
- Store Policies and Refunds: Remind new and repeat customers about important policies in your store: whether you offer a money-back guarantee, details about shipping, delays, and more.
How To Insert The Sale Content Block
- Edit your Landing Page in the WordPress admin.
- The Sale Content block can be used anywhere on your WordPress site, but it is primarily intended for designing the sale’s landing page.
- If the setting is used in a page that is not assigned as a Landing Page, the sale period is calculated using the current active sale’s data.
- Insert the Sale Content block in the editor
- Click the [ + ] icon to search for the “Sale Content” block.
- Or, type
/saleto pull up the shortcut and insert the block.
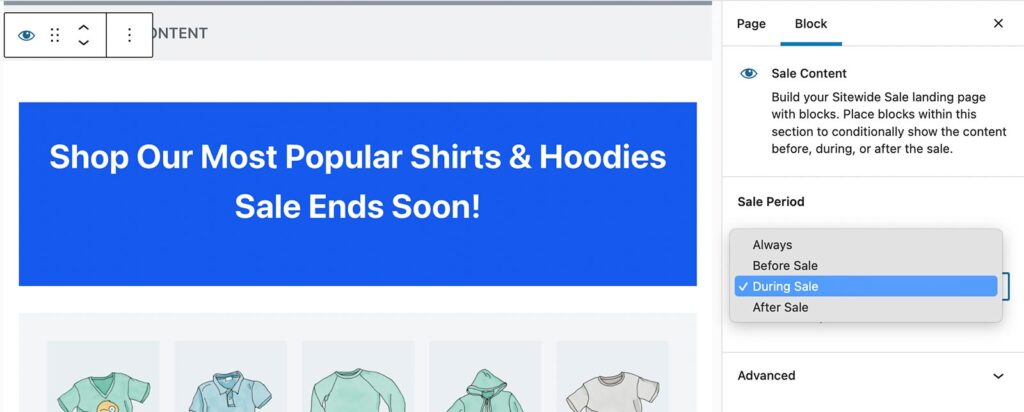
- Select an option for the Sale Period setting:
- Always: Content is always shown on the page regardless of the sale period.
- Before Sale: Content is only shown before the sale begins. The entire block is hidden when the sale is running or has ended.
- During Sale: Content is only shown when the sale is running (between the sale start date/time and end date/time). The entire block is hidden when the sale is running or before the sale begins.
- After Sale: Content is only shown after the sale ends. The entire block is hidden when the sale is running or before the sale begins.
- Insert any other blocks within the nested block area. This is where you truly design the content for your sale’s landing page.
- Save changes.
Screenshot: Sale Content Block and Settings in the WordPress Editor