The sale landing page plays an important role in the Sitewide Sale process:
- The landing page shows conditional content based on the sale period. You can show unique content when the sale is running, but also when the sale is coming soon (pre-sale) or already over (post-sale).
- A user’s landing page visit triggers how to handle the auto-discount logic for their checkout and strikethrough pricing throughout the store.
- The plugin tracks visits to the landing page in sale reports to help you evaluate sale performance and conversions.
Landing pages are totally optional. If you instead want to link your sale banner right to a product category or existing pricing page, that’s totally ok.
Video Tutorial
About Dynamic Landing Page Content
The Sitewide Sales plugin handles three time periods for conditional landing page content:
- Before the Sale
- During the Sale
- After the Sale
These time periods are drawn from the start/end date and time of (a) the Sitewide Sale linked to the specific landing page or (b) the active Sitewide Sale running on the site if the page is not attached to a specific sale.
How to Assign a Sale Landing Page
- Navigate to Sitewide Sales > All Sitewide Sales in the WordPress admin.
- Select a sale to edit or click “Add New” to create a new sale.
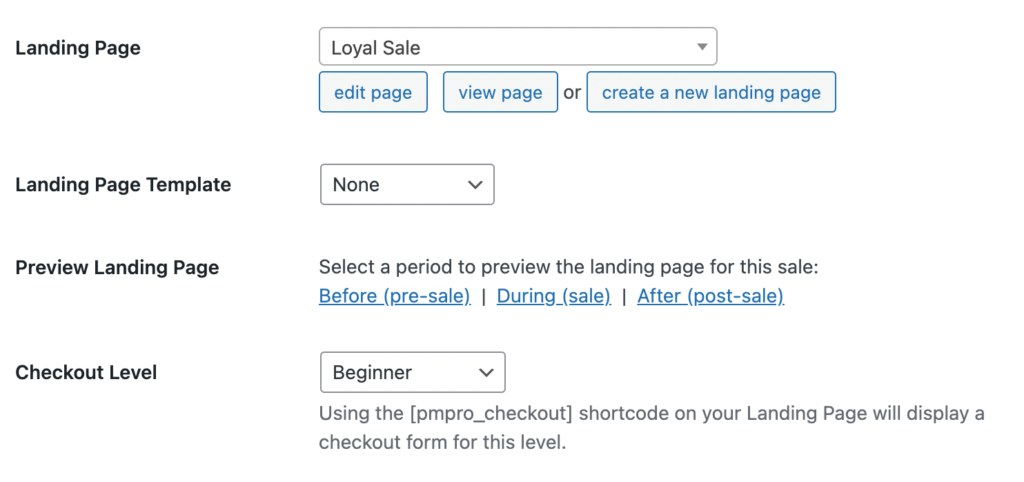
- Locate the Landing Page settings box.
- Choose a Landing Page
- Select the page to use for your sale’s “Landing Page”.
- You can generate a new page that will automatically insert the three sale period blocks as a starting point.
- Or, create the page on your own and come back to this screen to assign your page to the sale.
- Landing pages are totally optional. If you instead want to link your sale banner right to a product category or existing pricing page, that’s totally ok.
- Select a Landing Page Template
- Select a built-in theme for your sale’s landing page.
- Templates are totally optional.
- Check out our landing page demos to preview these themes.
- Configure Other Settings
- The sale’s selected module may add settings in the Landing Page section.
- Check out the docs for your module to learn more about the additional settings: WooCommerce, Paid Memberships Pro, Easy Digital Downloads, or the Custom Module.
- Save All Settings
How To Add Content to Your Sale Landing Page
Sitewide Sales supports a few methods to add content to your sale’s landing page.
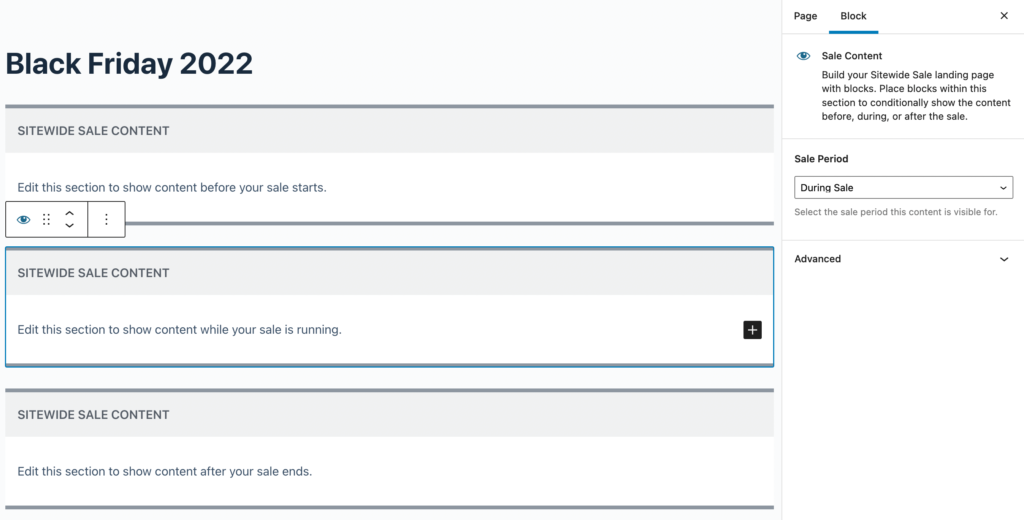
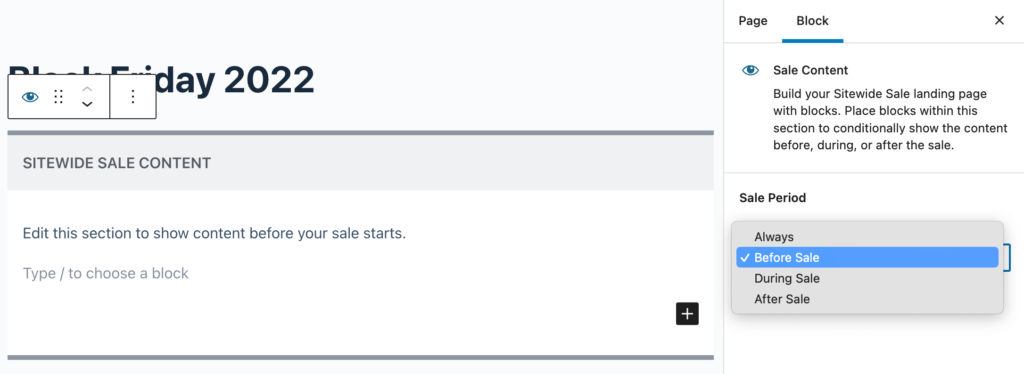
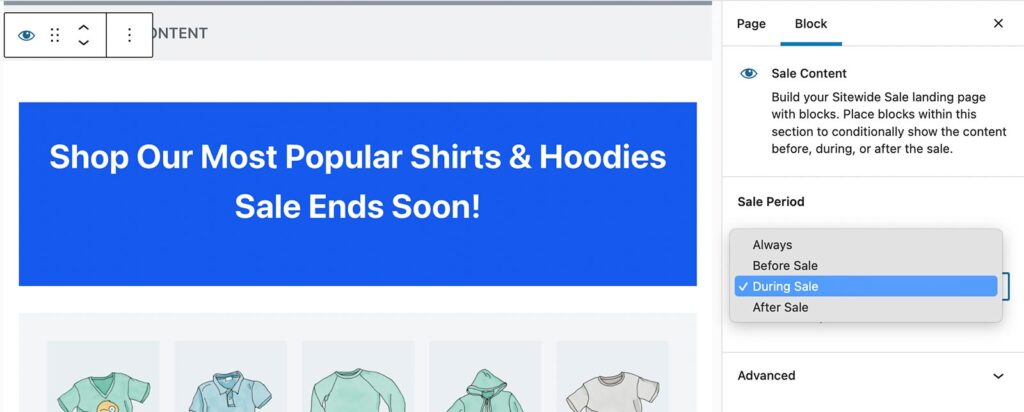
Sale Content Block
Sets the sale period (before, during, after) for every block within the container block. Nested blocks are automatically hidden or shown based on the parent block’s setting and the current date and time. This block is available for sites that use the WordPress Block Editor.
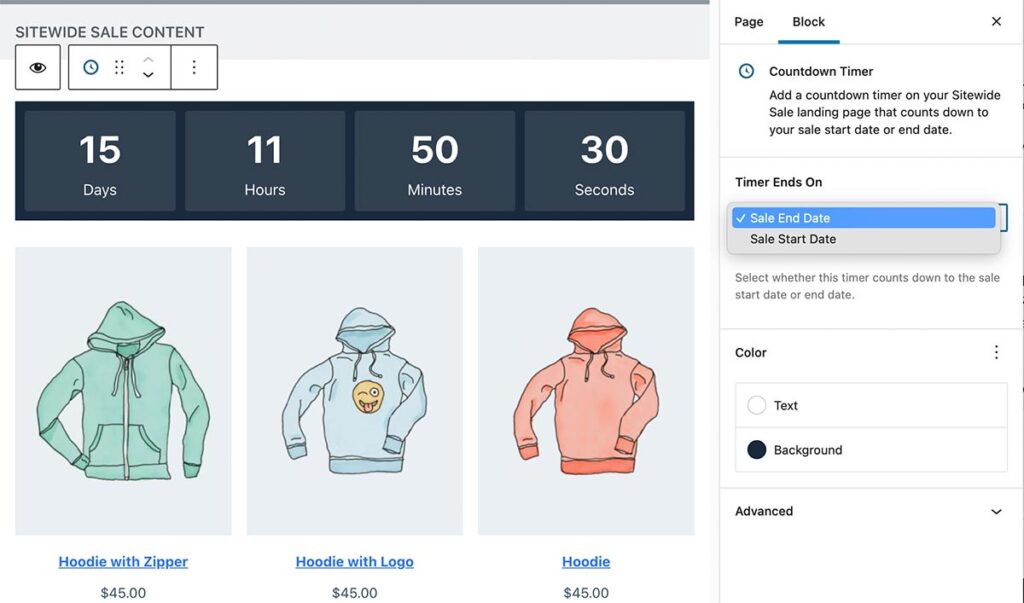
Countdown Timer Block
Show a countdown timer that counts down to the sale start date and time or the sale end date and time based on block settings. You can also configure the text color and background color of the timer. This block is available for sites that use the WordPress Block Editor.
Sale Period Visibility Setting
A block-level setting to toggle section visibility based on sale period (before, during, after). This setting is automatically added to three core WordPress block types: Group, Columns, and Cover. This block is available for sites that use the WordPress Block Editor.
Read docs on the Sale Period Visibility block setting »

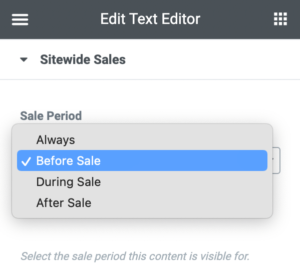
Elementor Compatibility
Restrict content by sale period at the element or widget level. You can choose to display content during the sale, or show specific elements before or after the sale only.
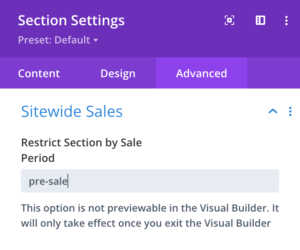
Divi Compatibility
Restrict content by sale period at the section or row level. You can choose to display content during the sale, or show specific elements before or after the sale only.
Landing Page Design Inspiration
Sitewide Sales is not a landing page design tool. If you need inspiration for designing your landing page, including the layout, colors, images, and sections, we have a few resources for you:
- Sitewide Sales Inspiration Sites: We build a website to aggregate the most unique online sales out there. There are ideas for landing page content, sale banners, offers, and more.
- Blog Articles on Landing Pages: Browse the Demon Content category in our blog for ideas on how to use built-in landing page templates or create your own landing page design, no matter which sale module you choose.
- One Page Love: Landing Page Inspo: Check out this third-party curated collection of over 1,400 landing page designs. Each page review includes a full screenshot of the website design along with noteworthy features.
Preview the Landing Page as Site Admin
If you are logged in as a user with the Administrator role, you can preview the sale content by including the swsales_preview_time_period attribute in the Landing Page URL.
- Preview “Before the Sale” Content:
https://yourwebsite.com/landing-page-slug/?swsales_preview_time_period=pre-sale - Preview “During the Sale” Content:
https://yourwebsite.com/landing-page-slug/?swsales_preview_time_period=sale - Preview “After the Sale” Content:
https://yourwebsite.com/landing-page-slug/?swsales_preview_time_period=post-sale
The Landing Page section of the Sitewide Sale > Edit Sale screen also has links to these previews.