
Quickly set up marketing banners or notification bars for your sale that only show up for the audience you want to see them. Helping you get as many customers to your sales landing page as possible. Banners can be designed in the Block Editor, with built-in banner templates, or with the Popup Maker integration.
Video Tutorial
How to Set Your Sale Banner
There are three support methods to create a banner for your Sitewide Sales. Here’s how to set started with a new sale banner:
- Navigate to Sitewide Sales > All Sitewide Sales in the WordPress admin.
- Select a sale to edit or click “Add New” to create a new sale.
- Locate the Sale Banner settings box.
- Banner Type: Choose from Reusable Block (Block Editor), Custom Banner, or Popup Maker (third-party plugin required).
- Depending on the banner type, you will see additional fields in this space, such as:
- Select an existing Reusable Block or create a new one.
- Select an existing Popup Maker popup or create a new one.
- Banner Location: Choose from three built-in locations to display your banner.
- Top of Site
- Bottom of Site
- Bottom Right of Site
- Banner Close Behavior: Choose how banners display if a user dismisses the banner:
- Close Until Refresh: Keep the banner hidden until the next page load.
- Close Until New Session: Keep the banner hidden for the entire browsing session.
- Module-Specific Settings: These section will show additional settings based on the selected sale module, such as:
- Hide Banner by Membership Level: With the Paid Memberships Pro module, this setting hides the banner for members of the selected levels.
- Hide Banner by Role: Choose from a list of built-in or added roles, such as “Customer”. You can also use this setting to hide banners for “Logged Out” users.
- Hide Banner at Checkout: Check this box to hide the banner on checkout pages. The checkout page is automatically detected based on the selected sale module.
- Save All Settings.
Designing a Banner With Reusable Blocks
The current release of Sitewide Sales makes it a lot easier to design banners with the WordPress Block Editor.
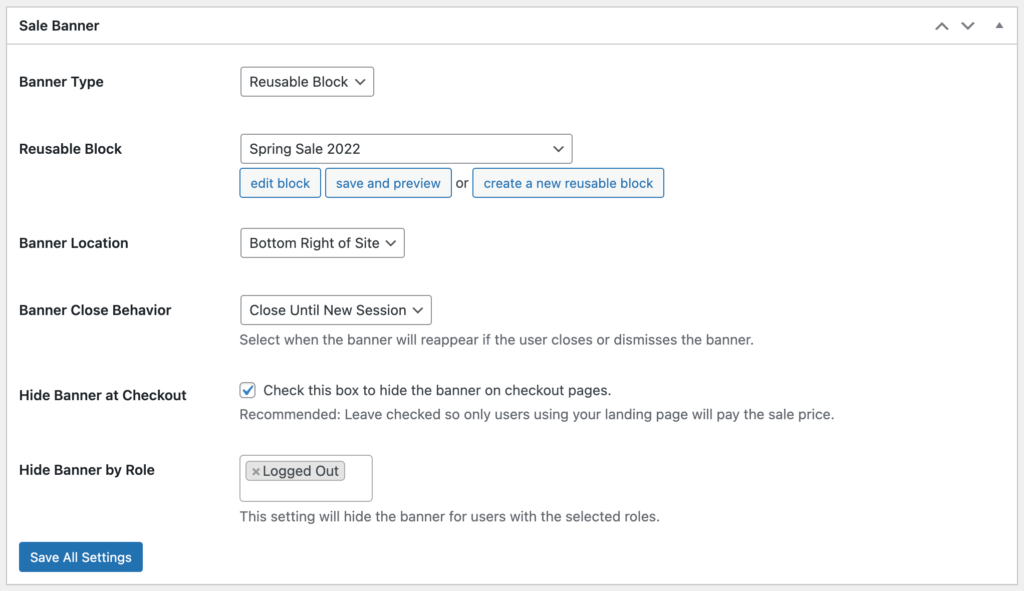
- On the Sitewide Sale edit screen, locate the Sale Banner settings box.
- Banner Type: Select “Reusable Block”.
- Reusable Block: Select an existing block, or click the button to create a new banner block.
- Use the general Sale Banner directions above to complete your banner setup.
- Save All Settings.
After saving settings, click the “Edit Block” button to open a new tab where you can design the actual sale banner.
- The Block Editor has tons of settings for headings, buttons, background colors & gradients, font colors, font sizes, images, and more.
- Depending on your theme or any other Blocks plugins in place on your site, there may be other design options available to you.
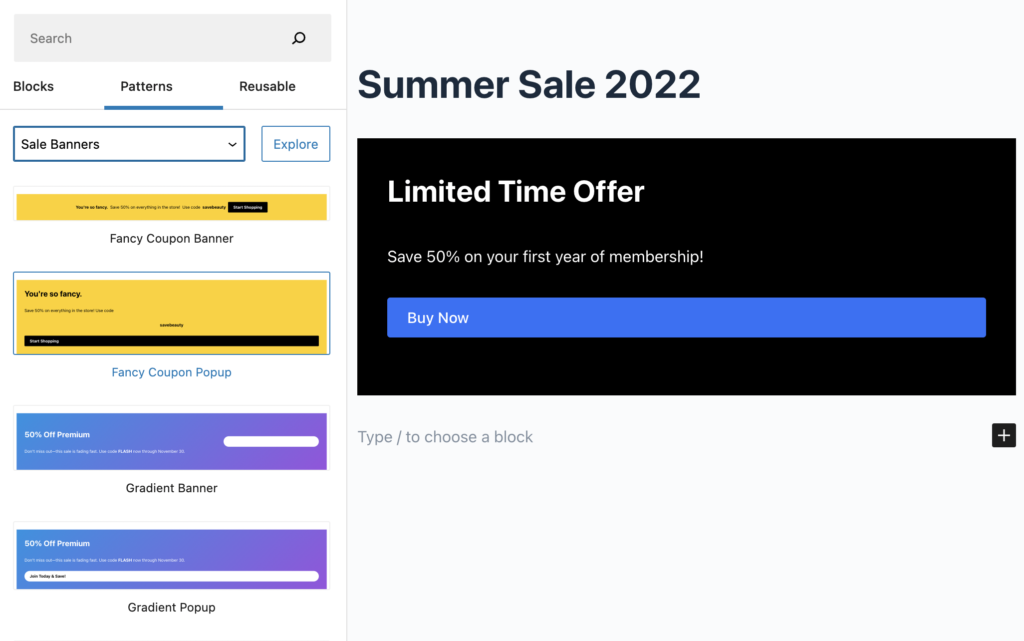
- Sitewide Sales also has built-in Block Patterns for sale banners.
- To use a Block Pattern, click the “+” icon in the editor window and select “Browse All”.
- In the left sidebar, click “Patterns”.
- In the dropdown field, select “Sale Banners”.
- Select any pre-build pattern as a starting point for your banner design.
- Click “Update” to save changes to your banner block, or “Publish” to activate the banner.
Integrate Sitewide Sales with Popup Maker
If you’re already using Popup Maker, you can assign any popup to your sale. Most of the popup’s design rules and display triggers are inherited by the rules in Popup Maker. Sitewide Sales controls the time period that the popup is allowed to trigger.
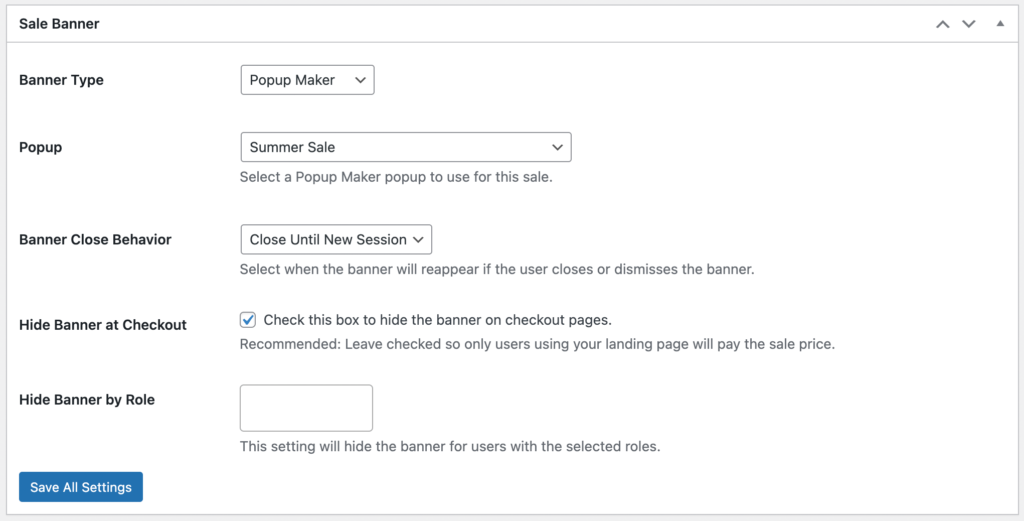
- On the Sitewide Sale edit screen, locate the Sale Banner settings box.
- Banner Type: Select “Popup Maker”.
- Popup: Select a Popup Maker popup to use for this sale. If you need to make a new popup, save your sale settings and return to this screen later (after you’ve published the popup).
- Use the general Sale Banner directions above to complete your banner setup.
- Save All Settings.
Note: You must still set up the triggers for the popup in Popup Maker. Sitewide Sales will control the time period that your popup shows, but the display rules are all configured in Popup Maker.
Designing A Custom Banner
Before the Reusable Block banner type, all banners were created from the single sale settings page. You can still leverage this banner type by following these steps:
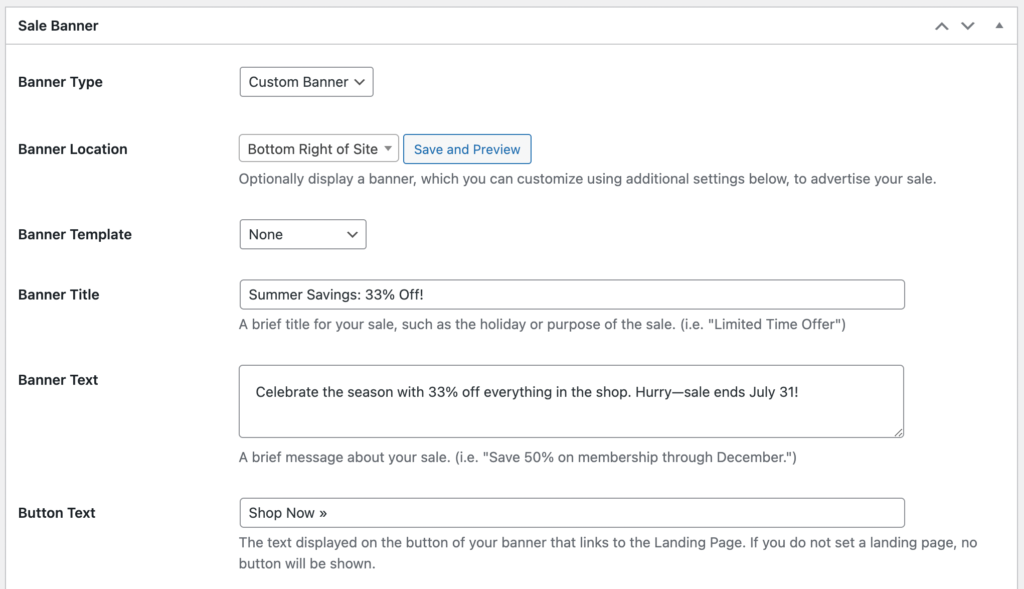
- On the Sitewide Sale edit screen, locate the Sale Banner settings box.
- Banner Type: Select “Custom Banner”.
- Banner Location: Choose from three built-in locations to display your banner.
- Top of Site
- Bottom of Site
- Bottom Right of Site
- Banner Template: Select one of the included banner templates or choose “None”.
- Banner Title: Enter a heading or title message about your sale. (e.g. “Save 25% On Everything!”)
- Banner Text: Enter a brief description of the sale. (e.g. “Now through 12/31, take 25% off everything in the store.”)
- Button Text: The text displayed on the button of your banner that links to the Landing Page. If you do not set a landing page, no button will be shown. (e.g. “Shop Now”)
- Use the general Sale Banner directions above to complete your banner setup.
- Save All Settings.
Previewing Banners as the Site Administrator
If you are logged in as a user with the Administrator role, you can preview the banner by clicking the “Save and Preview” button in the Sale Banner settings box.
You can also preview the banner appearance by manually adding the swsales_preview_sale_banner attribute to any page URL. You must specify a Sitewide Sale’s ID in the URL in order to test the banner.
You can test a specific banner location by adding the &swsales_preview_sale_banner_type= attribute set to top, bottom, or bottom_right. Examples for generating these URLs based on the Sale timing are listed below.
- Preview the Top Banner:
https://yourwebsite.com/?swsales_preview_sale_banner=150&swsales_preview_sale_banner_type=top - Preview the Bottom Banner:
https://yourwebsite.com/?swsales_preview_sale_banner=150&swsales_preview_sale_banner_type=bottom - Preview the Bottom Right Banner:
https://yourwebsite.com/?swsales_preview_sale_banner=150&swsales_preview_sale_banner_type=bottom_right