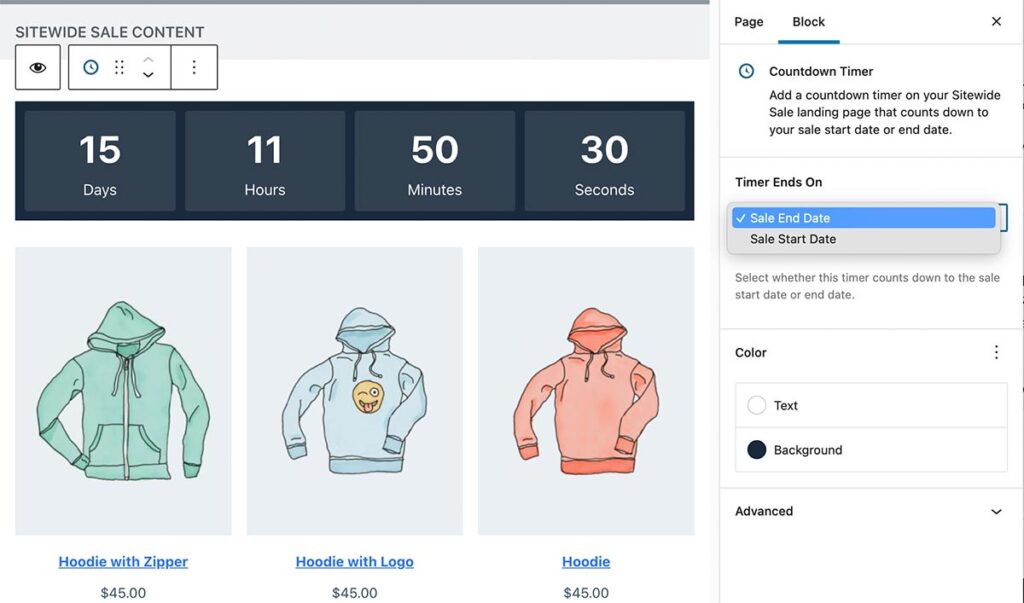
Show a countdown timer that counts down to the sale start date and time or the sale end date and time based on block or shortcode settings. You can also configure the text color and background color of the timer (block method only).
How to Insert the Countdown Timer Block
- Edit your Landing Page or Sale Banner in the WordPress admin.
- The Countdown Timer block can be used anywhere on your WordPress site.
- If the block is inserted in a page that is not assigned as a Landing Page, the timer date and time uses the current active sale’s data.
- If the block is inserted in a banner, the timer date and time uses the current active sale’s data.
- Insert the Countdown Timer block in the editor
- Click the [ + ] icon to search for the “Countdown Timer” block.
- Or, type
/countdownto pull up the shortcut and insert the block.
- In the block settings, set the Timer Ends On setting to show a timer that counts down to the Sale Start Date or Sale End Date.
- Adjust the timer’s text color and background color.
- Save changes.
How to Insert the Countdown Timer Shortcode
- Edit your Landing Page or Sale Banner in the WordPress admin.
- The Countdown Timer shortcode can be used anywhere on your WordPress site.
- If the shortcode is used in a page that is not assigned as a Landing Page, the timer date and time uses the current active sale’s data.
- If the shortcode is used in a banner, the timer date and time uses the current active sale’s data.
- Add the shortcode
[sitewide_sale_countdown]to your post content. The shortcode has two optional parameters:- sitewide_sale_id: Enter the numeric ID of the sale for this timer. If none is specified, the shortcode uses the landing page’s assigned sale ID OR the active sale for your site.
- end_on: Enter
end_dateto count down to the sale’s end date orstart_dateto count down to the sale’s start date. The default shortcode counts down to the sale’s end date.
- Save changes.
Screenshot: Insert Countdown Timer Block in Editor

Screenshot: Landing Page with Countdown Timer to Sale End Date and Time

