This video and written tutorial gives you the step-by-step instructions to create a Sitewide Sale in your WooCommerce site. Follow this tutorial to:
- Create a notification bar banner that displays across your whole WooCommerce site
- Add a landing page that highlights discounted products
- Set up a coupon code and automatically apply it to the checkout
- Show strike-through pricing throughout the shop
Video Tutorial: How to Create a Sitewide Sale In WooCommerce
Table of contents
Required Plugins for a WooCommerce Sitewide Sale
For this tutorial, I’m using a basic WordPress site with the following theme and plugins:
- WooCommerce: a WordPress ecommerce plugin
- TwentyTwenty: the WordPress default theme for 2020 by WordPress.org
- Sitewide Sales: an all-in-one flash sales plugin for WordPress
How to Set up a Sitewide Sale in WooCommerce
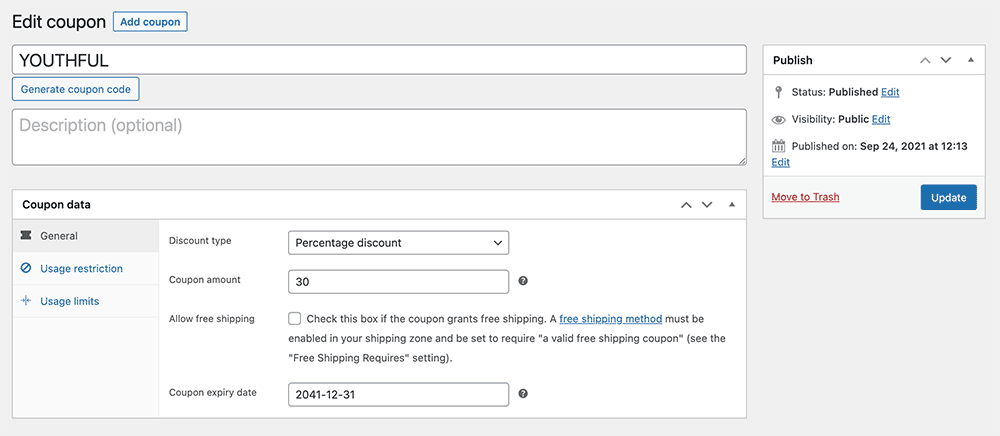
Create Your Coupon in WooCommerce
- Navigate to Marketing > Coupons in the WordPress admin.
- Click add coupon.
- In this tutorial, I set up a WooCommerce coupon code with the name ‘youthful’ that applies a 30% discount across all products on my site.
- Save the coupon.
Set Up Basic Sale Settings
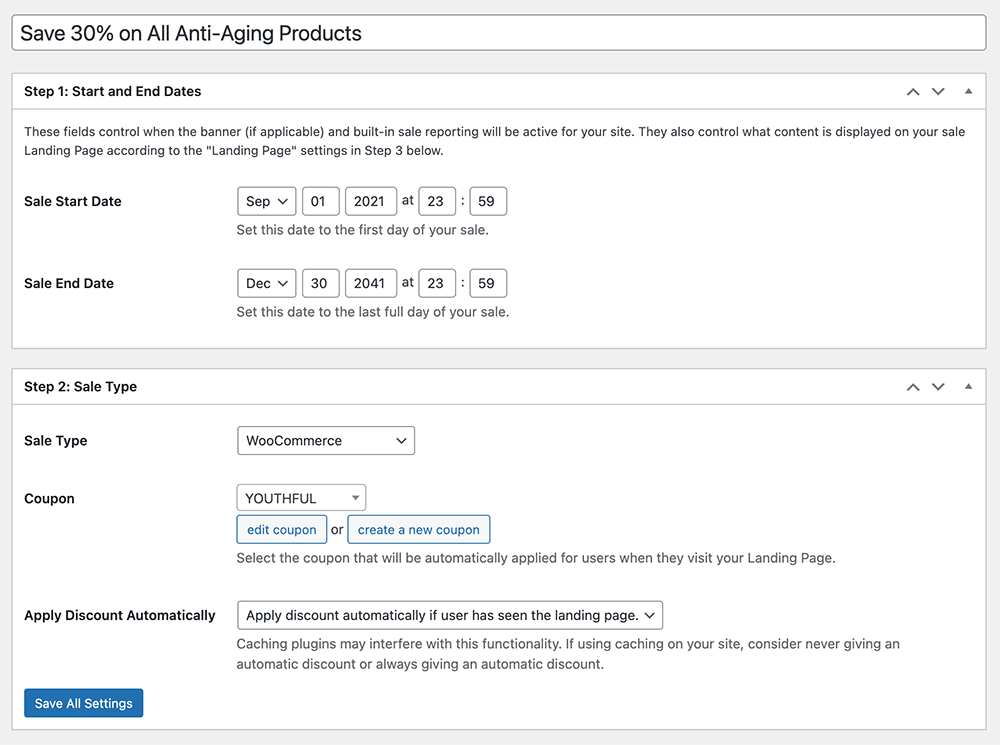
- Next navigate to Sitewide Sales > Add New in the WordPress admin.
- Enter a basic title for your sale that will be used for internal reference only.
- Configure your sale’s start and end date.
- Next select WooCommerce for the sale type.
- In the Coupon dropdown, select the ‘youthful’ coupon we just created or any other coupon that you created to be used for this sale.
- Choose whether to apply the discount automatically. For this sale, I set the code to apply the discount automatically if the user has seen the landing page.
- Click save all settings.
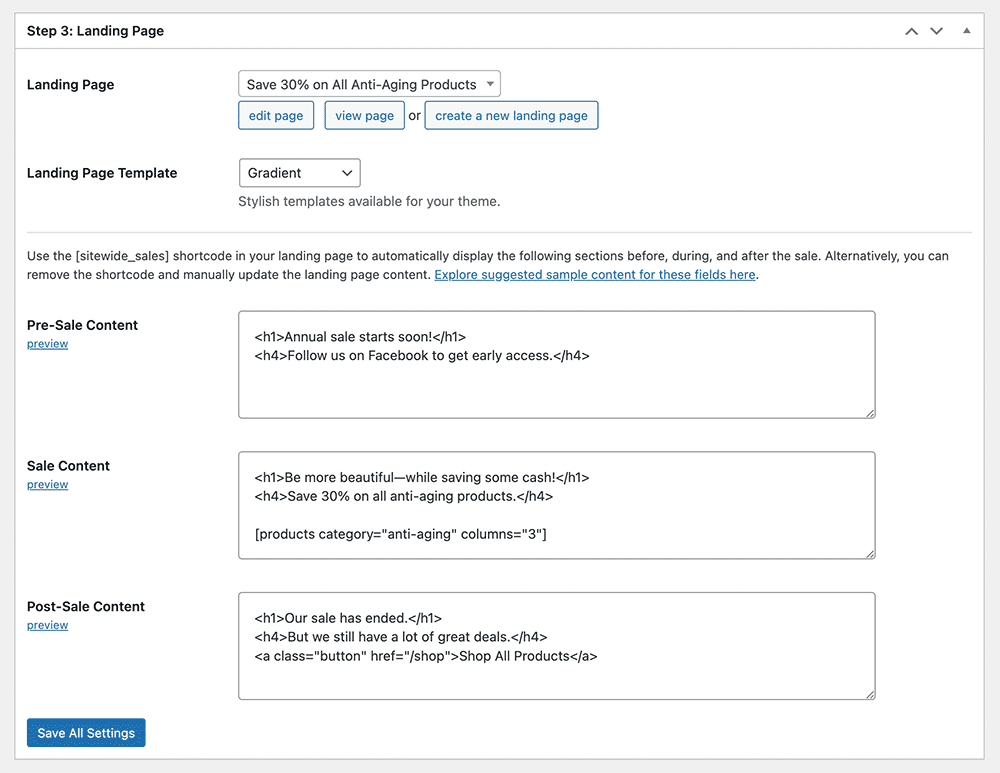
Create a Sale Landing Page
- Now it’s time to set up the landing page for your sale.
- In the ‘Step 3: Landing Page’ section of the Sitewide Sale Edit screen, click create new landing page.
- For this landing page, I used the gradient template built in to Sitewide Sales.
- Next enter some content to be shown on your landing page before the sale begins, while the sale is actively running, and once the sale has ended.
- When the sale is running, I want to show a shortcode that’s provided with WooCommerce to show the category of products ‘anti-aging’.
[products category="anti-aging" columns="3"] - Click save all settings.
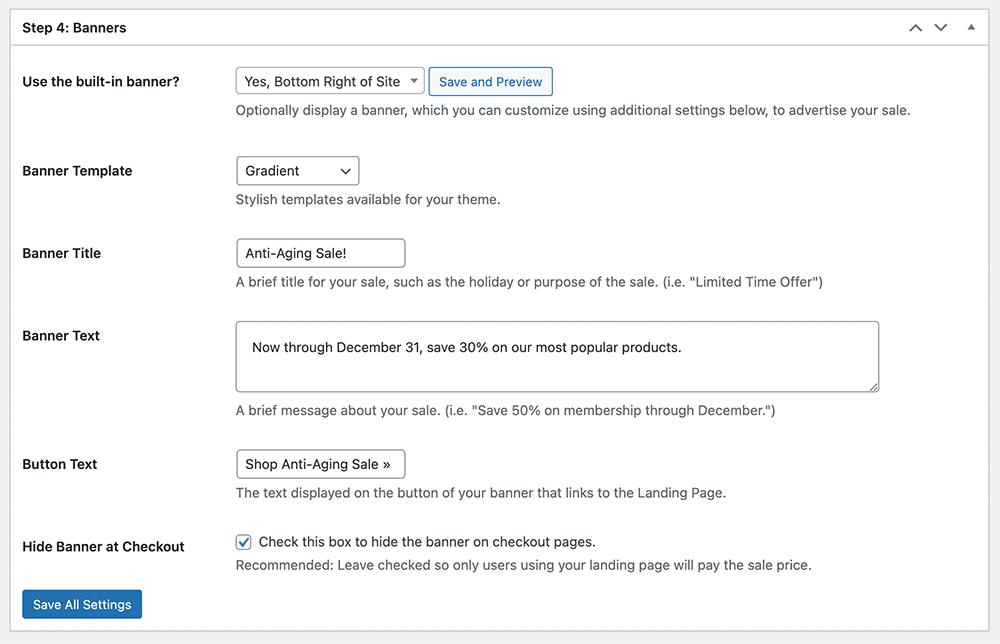
Create a Top Bar Sitewide Sale Banner
In step four, select to use the built-in banner shown at the top of the site.
- For this banner, I used the gradient template built in to Sitewide Sales.
- Enter a title and text to be shown in your banner.
- Adjust the button text and click save all settings.
Activate Your Sitewide Sale
It’s time to launch your sale! When you’re happy with the sale design and settings, click the ‘Set as current Sitewide Sale’.
- The sale will automatically start to display your sale banner on the start date.
- Your landing page will show the right message based on the sale timing (before, during, after).
- The banner will automatically turn off when the sale ends (on the sale end date).
You can now browse your site as a logged in user or as a visitor to see the banner across the top of your site, click to view the landing page, visit a single product page to see strike-through pricing, and add products to your cart with the coupon code ‘youthful’ automatically applied.
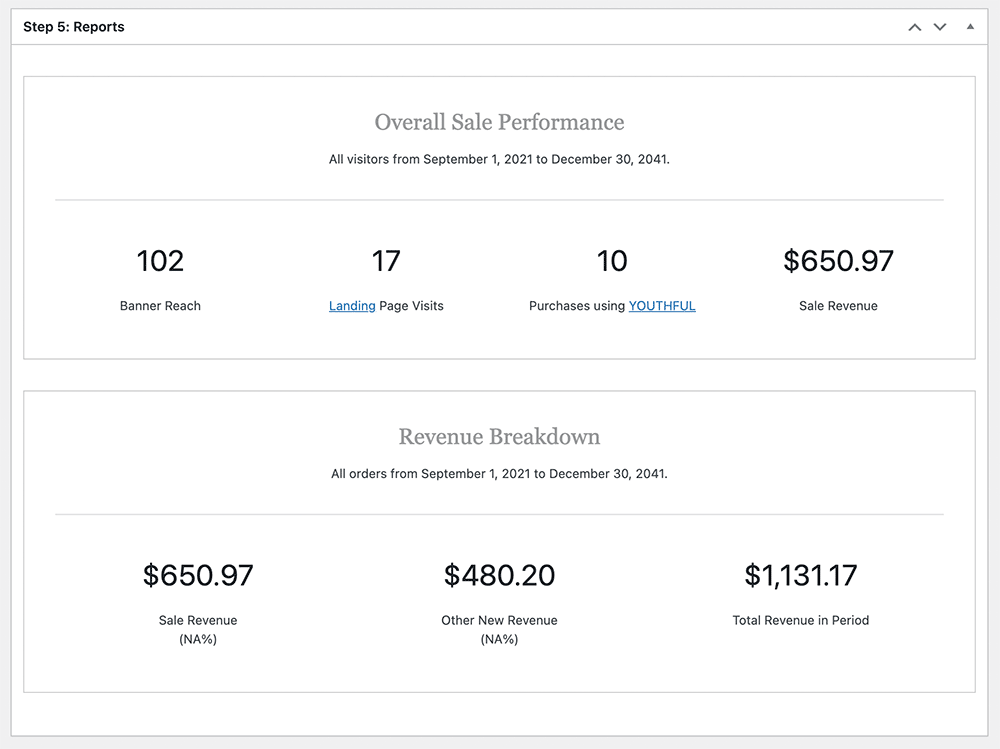
When you sale is live, check out your reports to see how the sale is performing. Sitewide Sales tracks banner views, landing page visits, and checkout conversions using your sale’s coupon code. The plugin also shows a breakdown of all revenue generated in the period with and without a discount code.
Rethink How You Run Sales with WooCommerce
Sitewide Sales is a new way to run sales for your WordPress-powered ecommerce site. Using Sitewide Sales, you can set up an active promotion that runs from your set start time and end time.
The plugin automatically applies discounts according to the rules you set up—no coding required. If you want to run a true sale that automatically applies a discount without the need for manual coupon entry, you need try the Sitewide Sales plugin—it works with WooCommerce and other popular ecommerce plugins for WordPress.